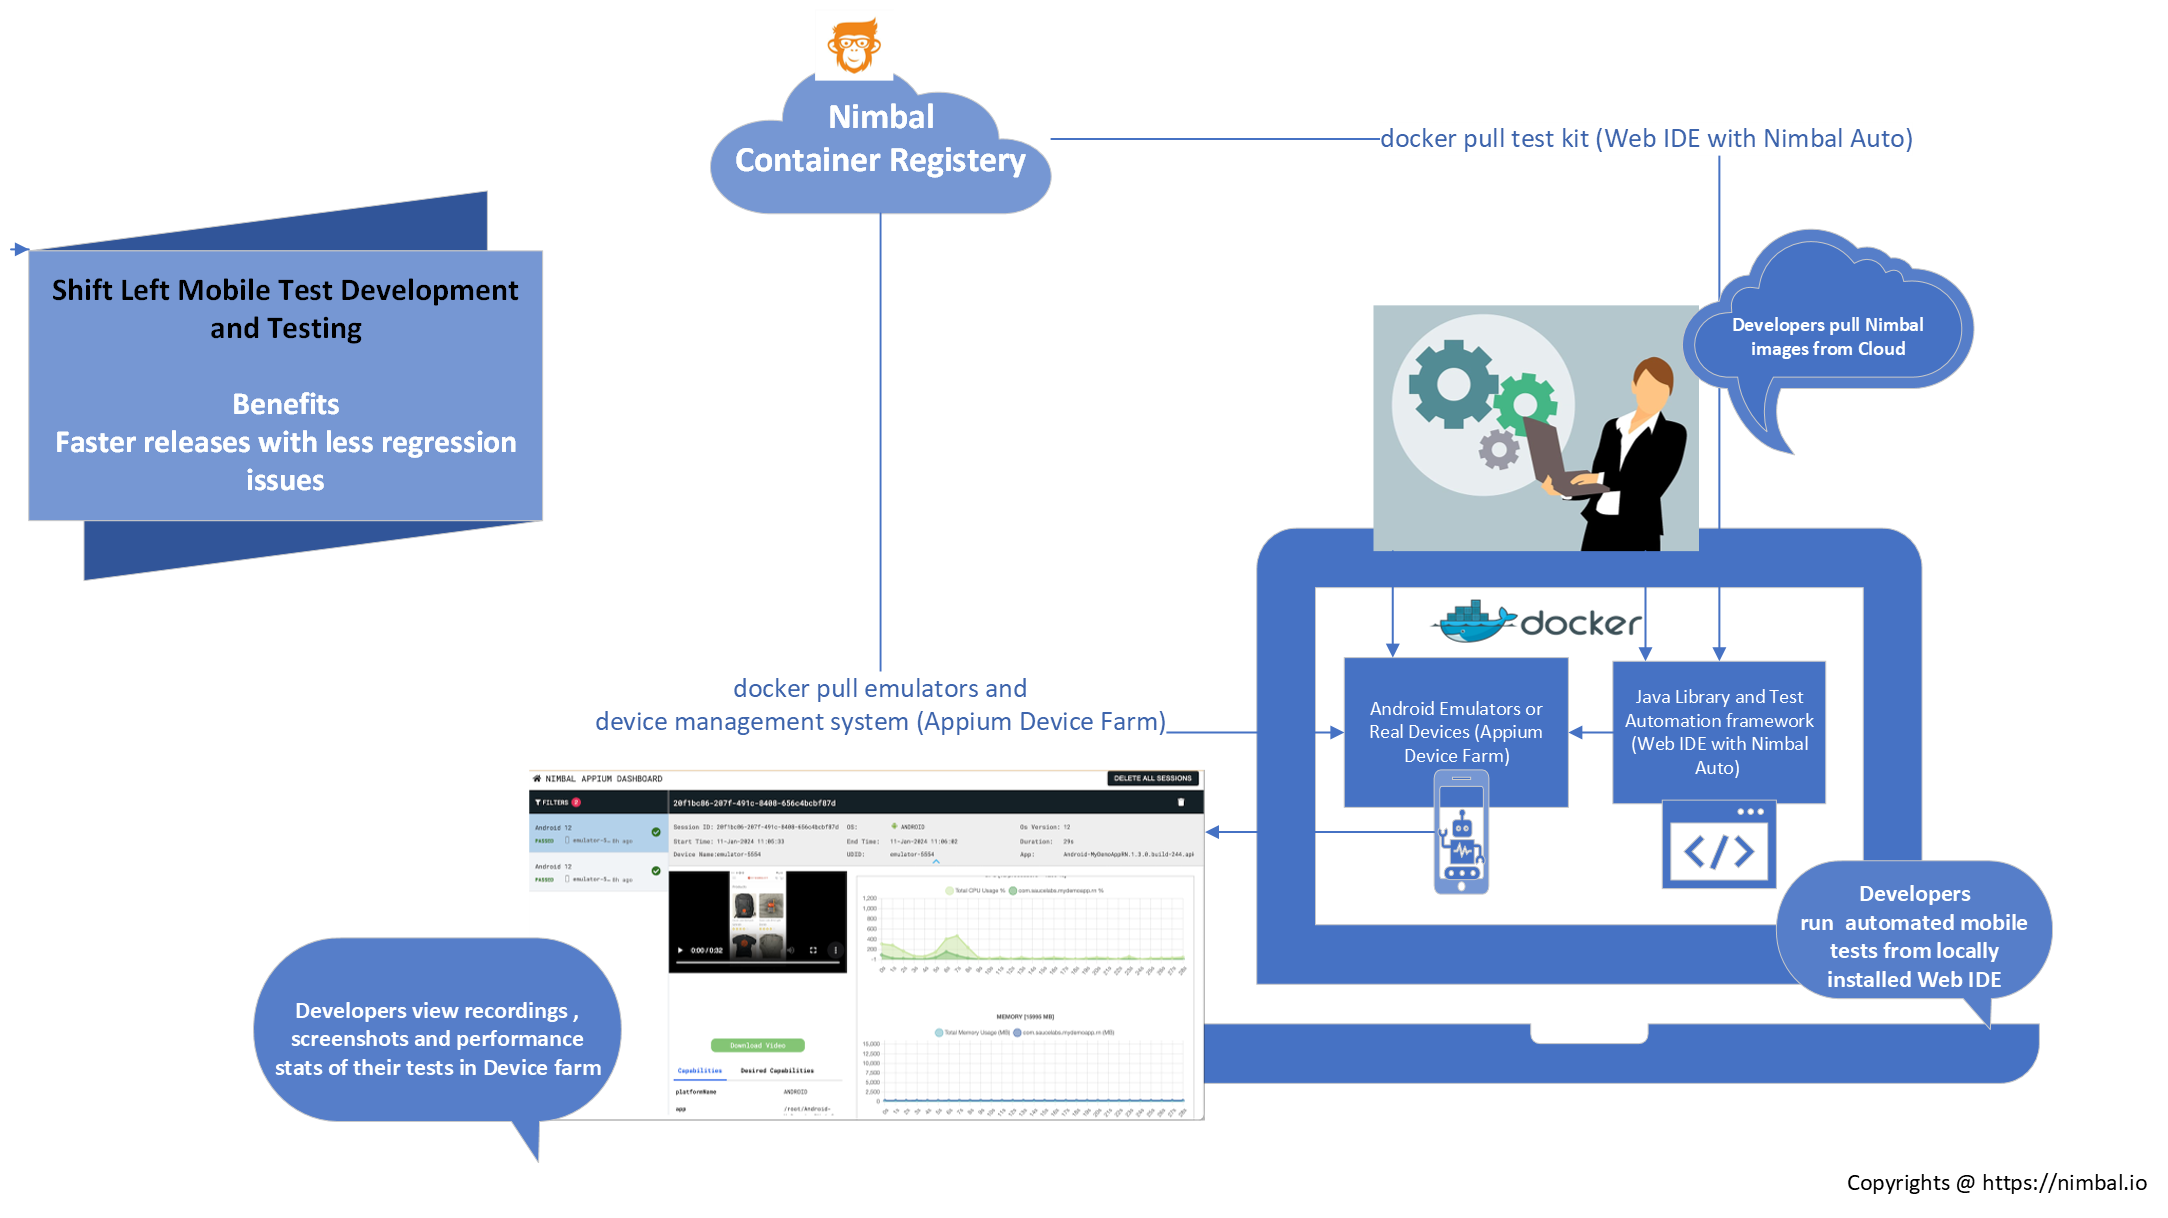
This blog provides step-by-step instructions for configuring an Appium mobile device farm solution on local or CI/CD agent machines. This setup allows mobile development teams to implement Shift Left testing in their Agile development processes.
While this guide focuses on configuring a Google Nexus Android image, it is applicable to hundreds of other mobile phone images that can be integrated similarly.
An alternative to this setup is to use cloud-based mobile device farm services, which can cost thousands of dollars per device on average.
Please find more details about various Mobile device farm options for your developers at our blog.
At Nimbal, we aim to make mobile development accessible and affordable. We are excited to share this solution, developed through our extensive research and development, to benefit all mobile developers.
Prerequisite
- Have a Linux or Windows instance having nested virtualization enabled,I’m using an azure instance with 4 VCPU and 16 GB Linux machine (i.e. instance ip is 172.171.216.76)
- Docker should be installed on the instance
Installation Instructions
Steps:
- Login to your Linux machine Terminal
- Login to the Nimbal’s container repository where container image of Nexus is stored with following command. Please make sure you have credentials from Nimbal to get the image.
# docker login theia.azurecr.io
3. Pull the image with the following command
# docker pull thiea.azurecr.io/nexus_6
- Run the container with the following command
a. Port 5900 is used to view the container UI
b. Port 5901 is an alternate to view container UI
c. Port 5922 is used to transfer the application apk using the ssh . d. Port 31337 is where device farm is running After a successful run a container id will be generated# docker run -it --privileged -d -p 5900:5900 -p 5901:5901 -p 5922:22 -p 31337:31337 --privileged thiea.azurecr.io/nexus_6
5. If you visit port 31337 , the device farm will be up and running.
6. After a few minutes or so an emulator will be shown as well, for me it took around a minute to show up as shown below
7. Now,let’s upload our test application apk to run. Click on Apps section of Device, which is 3rd option from left
8. Upload the app, note down the name of the file shown. In our case name is “file- 1718113676779.apk”
9. Run the test with the following configuration
{appium:app:file-1718113676779.apk, appium:automationName: UIAutomator2, appium:deviceName: Nexus 6 API 31, appium:noSign: true, appium:udid: emulator-5554, platformName: ANDROID}
Here is how it looks in my project as shown in the below image . Please note that appPackage and app activity is being ignored here.
10. We will be running following android test . This android test will simply
a. Open the app
b. Click on bike element
c. Then verify if the bike text is present or not.
d. And at the end will close the application.
11. Notice the emulator is busy running the test.
12. After the test finishes it will go back to the ready state. Then visit dashboard
13. In case of error, please check if you are allowed to access the port and whitelist it accordingly.
14. If the emulator does not start after a few minues, please make sure that you have at least 12 GB or more RAM free, as this is a very resource intensive task. Or connect a real device using respective documentation provided.
15. Please make sure the system has nested virtualisation enabled
For step by step screenshots, please refer this document
Thanks for reading our blog.
We have developed AI Agents that can help you review your websites and web apps instantly. Learn more at Nimbal AI
Credits: Appium Device Farm Project , Sauce labs sample app
